Simple Twitter - Chapter 2: Planning
First thing we need to do, before we even start writing a single line of code, is to plan. Plan our MVP.
How it's going to look? What features it will have? Wha a user can or cannot do? Will there will be somethings a user can do without sign in? How our API will look like? How our Database Architecture will look like? How the client and server will communicate? Where are we planning to deploy it and how?
A lot of questions to answer in one post, but we'll do our best!
1. Planning Our MVP
What is even mean MVP? MVP is an acronyms of minimum viable product. It's a development technique in which a new product is developed with sufficient features to satisfy early adopters. The final, complete set of features is only designed and developed after considering feedback from the product's initial users.
An MVP has three key characteristics:
- It has enough value that people are willing to use it or buy it initially.
- It demonstrates enough future benefit to retain early adopters.
- It provides a feedback loop to guide future development.
Let's start to think about the minimal number of futures, from a high point of view, we need on Twitter.
1.1. User
- We need users of course, they should have a way to sign-up and login with a username and a password. And we should probably validate their account by sending an email to their email address to complete the sign-up process.
- Every user should be able to do something called Tweet, send a public message that is limited to 140 characters.
- Every user should have a profile page, with their basic information, and a list of all their tweets ordered from the last one by time (called timeline page in Twitter).
- Every user can follow and be followed by other users (more on that in section 1.2).
- Every user have a feed (more on that in section 1.5).
1.2. Following and Followers
- A user need to actively decide to follow another user, e.g. to go to user 2 profile page and press on the
followbutton. - The user 1 (who been follow) do not need to accept the following and cannot decline it, but he can see the list of users who are following after him.
- When a user (user 1) decide to follow some other user (user 2), he (user 1) will see all of user 2 tweets from the begging (and not from when user 1 start to follow user 2).
1.3. Tweet
- Every tweet should be limited to 140 characters.
- Every tweet should have
replays, they are also a tweet, so they are also limited to 140 characters. - Every tweet have a
likecounter, which reflects how many people are liking the content of the tweet. - Everyone can see the
likecounter and the list of people wholikethat tweet. - A tweet will contain only text and images.
- All tweets need to be linkable (have a unique link people can share).
- When enter a tweet page, a user should be able to see all of the comments (also other tweets) of that tweet.
1.4. Replays
- A replay should be seen in the feed as a regular tweet.
- It should reflect to which tweet the current tweet is replay to.
- When enter to a replay, the user should be able to scroll up and see the original tweet this tweet is replays to.
1.5. Feed
- The feed will be custom to every user.
- The feed will show the tweets and replays other users tweeted. The only tweets that will be shown on the user feed are tweets from users he follows (not random users and not users who are follows him).
1.6. What we are not want to do for this MVP
This may not seem like a lot of work, but it does. We don't want to do things we don't know if our users will use. And the strongest reason to not build those features is that this series needs to end sometime (:
- We don't want to
retweet. - We don't want to add gifs or videos to a tweet.
- We don't want to quote a tweet.
- We don't want to send a private tweet (DM).
- We don't want to
pintweets. - We don't do
Trends. - We don't suggest new people to follow.
- We don't plan to scale for 1 billion users, not even close to that. We'll think about performance but it's not the purpose of this series, so don't get distracted.
I think we have a good set of features, let's plan our architecture and database next.
2. High Level Architecture
The next step we need to do is to plan our architecture. The first thing I decide is to use as much SASS as I can. The reasons are:
- I'm a one man show here and I can't do everything alone.
- Most of the time it's better to pay to experts to do what they're do best, and do not get distracted from our product.
- This series needs to end sometime, it cannot cover all the things.
So, we're not going to host our website ourselves, we'll need Google Cloud Platform (GCP for short). If it's your first time on their platform they're offer a credit worth $300, so just use your gmail and don't worry about payment, if you're already used your credit, you have 3 options:
- Keep the uses on their products limited to the free tier.
- Open a new Google account just for this project.
- Pay the bill.
The services we're going to use on GCP are:
- Kubernetes Engine will manage our backend via a Docker containers (more on that in the future), and load balance between couple of backend instances (replicas), check our containers health, etc.
- A Storage to create a 2 buckets, first to store our Client/UI (angular files, static files). Second to store all of our media files (mainly pictures from users and tweets).
- Logging to collect all of the logs we print to the
stdout. - Error Reporting to collect all of the errors that are logged to the
stdout. - Monitoring to monitor our API and alert us if anything goes wrong.
- Cloud Build our Docker images and
applythem to Kubernetes (the CD part in CI/CD).
2.1. Database
Our database of choice is MongoDB. On our local machine we'll use a single node of Mongo and Robo 3T as our GUI (to see what is going on inside of our database easily). But on the cloud we don't want to create an instance of MongoDB and manage it alone (update it, manage master/slave instances, automatically backup, round robin backups, check once in a while a backups is good and we are able to restore from it, etc).
So in the our production we're going to use MongoDB cloud called Atlas. To been able to connect it to our GKE (Google Kubernetes Engine) we have to use at least M10 tier. This means it's going to cost us money, M10 (3 nodes replicas) with 10GB storage (which is the minimum and is more then enough for us) cost $0.09/hr.
So, when we'll get there I'll also write a section to deploy a single node of MongoDB to our cluster (that we are already using in GCP). This is in no way close to been production ready. But it's here for people that cannot afford the cost of MongoDB cloud and want to continue with the series and deploy their website to the cloud. I'll not expend on that, it'll be a "development ready" solution, and the rest of that post will be focus on connecting our MongoDB Atlas instance to GCP for "production ready" level.
2.2. More Tools
We'll also use some more tools like GitHub repositories and GitHub actions (for the CI part of CI/CD), but we'll use public repos (repositories) so those will be free of charge.
2.3. Architecture Schema
How we're going to connect everything? Here is our technical product schema:

Every request to our website in going to first hit our domain. From there it'll get to a load balancer how sits in front of our bucket and will serve the user the static files in the bucket (our Angular app).
Then the browser will probably request some images (from the static bucket) and in parallel the code in the frontend will send requests to our backend to get the data we need (in a form of JSON format), using a REST API we'll write in our backend.
Some of the endpoint will be protected, the user will have to sign in before they use them and will get a token, with that token he'll send a request to the backend and if the token is valid he'll get the data he need or post a new data (tweet), etc.
The backend has couple of instances and have an nginx in front of them for reverse proxy and load balancing. Every request will first hit the nginx (represented as Cloud Load Balancing on our schema) and then will get to one of them backend instances. When the backend code will need the database to make a query it'll call it using mongoose in a regular fashion. In our environment variables we'll make a distinction between dev and prod environments and will call our MongoDB Atlas Cloud cluster.
Every request or error will be logged to stdout. And other services in GCP (that we'll setup) will be able to collect and analyze our logs to give us a pictures of what is happening on our product. That will also help us to monitor it, and catch and fix bugs.
2.4. CI / CD Pipleline
The way we'll deploy new code to the cloud will use GitHub actions, and GCP Cloud Build triggers.

In our repo we'll have GitHub action that run a linter, run the tests and make sure there isn't any error when build the projects. When we'll merge Pull Requests to the master branch, the action will run and if everything is good it'll create a new tag for the new commit.
On the other hand, we'll use GCP Cloud Build trigger to catch new tags in the repos and using cloudbuild.yaml file (that is the default name of the file that cloudbuild is expecting) we'll build our project (backend or frontend, every repo will have it's own cloudbuild.yaml file with a set of instructions on how to build that project).
The backend will build a Docker image (using a Dockerfile), will host it on GCP Cloud Registry and will apply the new kubernetes yaml files so that kubernetes will take the new Docker image.
The frontend will build the Angular app and will copy the files to a public bucket (instead of the old files that was there before).
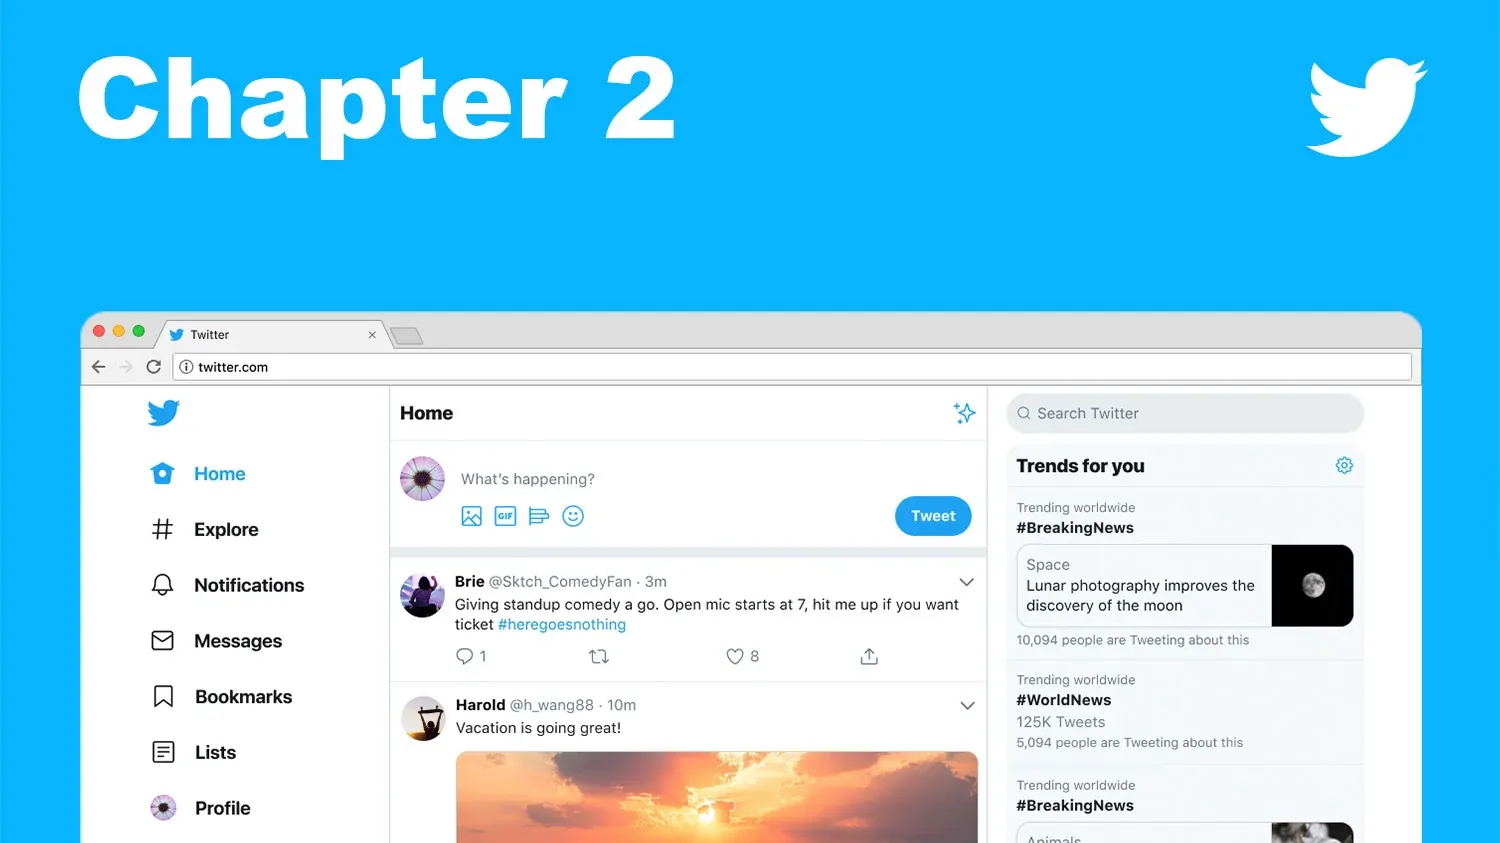
3. Screenshots
In order to be on the same page I took a bunch of screenshots of Tweeter and cleaned it up a bit (remove some of the feature we'll not build), let's go over them and see what we're building.

After we hit the Home Page we can Sign up or Log in, in twitter the Sign-up button will bring a popup and the Log in will move us to a new page. We'll not do data, the Sign up will bring a popup with couple of inputs to fill to sign up, and the Log in will just try to login the user using the username and password inputs above.

When the user logged in, or sign up and activate his account via the email confirmation he will get to the Feed Page. This is a list of tweets from the users that he follows, ordered by time (the most recent is at the top).
This is the main page of the website. From this page he can post a new tweet (at the top of the feed there is a textarea), and at the left side there is the navigation of the website. In the navigation there are links to: Notifications Page, Profile Page, and Settings page.

The Profile page (or timeline) has the same navigation in the left side, but in the right side of the page, instead of the feed, we see at the top the general user information, and under that a tab to see the user tweets by:
- Tweets (or timeline): this is all the user tweets in order (recent at the top).
- Tweets & replies: this will show all of the user tweets include the tweets that are replies to other users tweets.
- Media: Tweets that include some media type (in our case it can include only images).
- Likes: Tweets of other users that this users liked.

The Followers and Following Page has the same navigation the left side and the right is the same tab view of the Profile page with 2 lists. The first is users who followers after the current user and the second is a list of users who the current user follows after.

When the user clicks on a tweet he sees the original tweet (no more information that we didn't show in the Feed or Profile pages), but he sees some general info about the tweet (time of publish) and a list of tweets that replies to that tweet. The user also can click on the 334 Likes and it'll open a popup with the list of users who liked that tweet (I'll not show a screenshot of this to keep the post lighter and because the list is actually looks the same as the list of Followers & Following).
I will not add a screenshot of the Settings Page because it'll be pretty different from the Twitter one, because it's an MVP, we'll not have all the settings a full blown social media have. So we'll design it as close as we can to the design language of the website, but we'll not have a reference.
4. Routes
Let's plan all the routes that will be in our backend service. Every route is basically a Collection in MongoDB, we'll have a folder architecture that will put every Model (collection), routes, and controller of the same "group" together.
4.1 Users
| Method | Path | Auth | Description |
|---|---|---|---|
| POST | /user | None | Create a new user |
| PUT | /user | Token | Edit own info |
| DELETE | /user | Token | Delete own user |
| GET | /user/feed | Token | Get own feed |
| GET | /user/:username | None | Get a user info |
| GET | /user/followers/:username | Token | Get a user followers list |
| GET | /user/following/:username | Token | Get a user following list |
| POST | /user/follow/:username | Token | Start following a user |
| POST | /user/unfollow/:username | Token | Stop following a user |
| POST | /user/reset-password | None | Reset own password |
| PUT | /user/password | Token | Edit own password |
| PUT | /user/settings | Token | Edit own settings |
4.2 Notifications
| Method | Path | Auth | Description |
|---|---|---|---|
| GET | /notifications/:username | Token | Get all the notifications for a specific user |
| PUT | /notifications/:username | Token | Mark notification as read / unread |
4.3 Tweets
| Method | Path | Auth | Description |
|---|---|---|---|
| GET | /tweets/:username | None | Get all the user tweets (timeline) |
| POST | /tweet | Token | Create a new tweet |
| PUT | /tweets/:tweet_id | Token | Edit a tweet |
| DELETE | /tweets/:tweet_id | Token | Delete a tweet |
4.4 Media
| Method | Path | Auth | Description |
|---|---|---|---|
| POST | /media | Token | Upload a new image |
5. Database Schema
5.1. Users Collection
| Field Name | Type | required | unique | Description |
|---|---|---|---|---|
| firstName | string | false | false | User first name |
| lastName | string | false | false | User last name |
| username | string | true | true | User username |
string | true | true | User email | |
| profileImage | string | false | false | URL to the user profile image |
| active | boolean | true | false | User confirm his account via email |
| password | string | true | false | User hashed password |
| createdAt | date | true | false | User account created date |
| country | string | false | false | User country |
| website | string | false | false | User website |
| birthday | date | false | false | User birthday dat |
5.2. Followers Collection
| Field Name | Type | required | unique | Description |
|---|---|---|---|---|
| user | ref<user> | true | false | The unique user _id |
| follower | ref<user> | true | false | Unique follower user _id |
5.3. Following Collection
| Field Name | Type | required | unique | Description |
|---|---|---|---|---|
| user | ref<user> | true | false | The unique user _id |
| following | ref<user> | true | false | Unique following user _id |
5.4. Tweets Collection
| Field Name | Type | required | unique | Description |
|---|---|---|---|---|
| author | ref<user> | true | false | The unique user _id |
| text | string | false | false | Tweet text |
| image | array<string> | false | false | Array of URLs for tweet images |
| replay | ref<tweet> | false | false | The tweet _id this tweet replays to (if any) |
5.5. Likes Collection
| Field Name | Type | required | unique | Description |
|---|---|---|---|---|
| user | ref<user> | true | false | The unique user _id |
| tweet | ref<tweet> | true | false | The tweet _id the user liked |
5.6. Notifications Collection
| Field Name | Type | required | unique | Description |
|---|---|---|---|---|
| user | ref<user> | true | false | The unique user _id |
| userAction | ref<user> | true | false | The user who make the action |
| type | enum<like,follow,replay> | true | false | Get an image |
6. Summary
This was a lot of work, but we done. We now understand what we're going to build, and how. We have our MVP, some screenshot references, our routes and collection schema planning. And we understand how we're going to build everything (which technology stack we're going to use, how to deploy to it, and how everything will connect together to bring us to production).
We're ready now to start coding! So that's what we're going to do in the next chapter, hope you're excited as me right now.
📖 You might also like
Crack The Hash

In earlier post (at Passive.. Passive Recon.. Passive Reconnaissance.. OSINT!) I mention we can use hashcat to try and crack a password we found, but it wasn't the meaning of the post (and it's a red line for me to do that and put his cleartext passw
Like A Spy With Hak5 Toys

One of the things you always see in spy movies is how the main character plant a covert device to monitor the user computer (screen and keystrokes). As a kid I thought "This is very cool!", and I always wanted be able to do this. Hak5 making it very